
EQ: How can a direct cast sculpture be leveraged and utilized to create an impactful personal message using the hand as a basis of sculpture
- SWBAT identify art that communicates a message
- SWBAT consider multiple messages reflecting their passions
- SWBAT design a unique sculpture that uses the hand as a base to communicate a unique personal message
- SWBAT create a plaster wrap hand sculpture
- SWBAT identify art that communicates a message
- SWBAT consider multiple messages reflecting their passions
- SWBAT design a unique sculpture that uses the hand as a base to communicate a unique personal message
- SWBAT create a plaster wrap hand sculpture
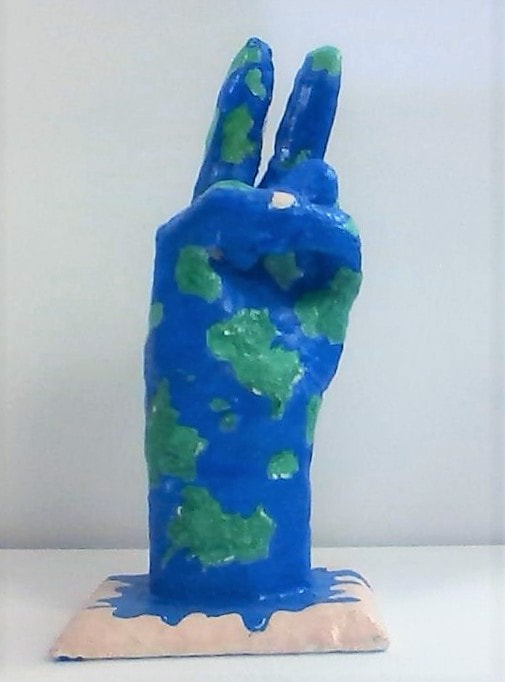
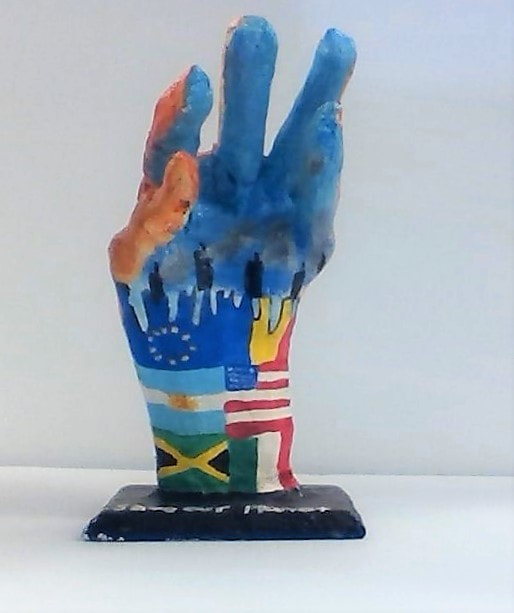
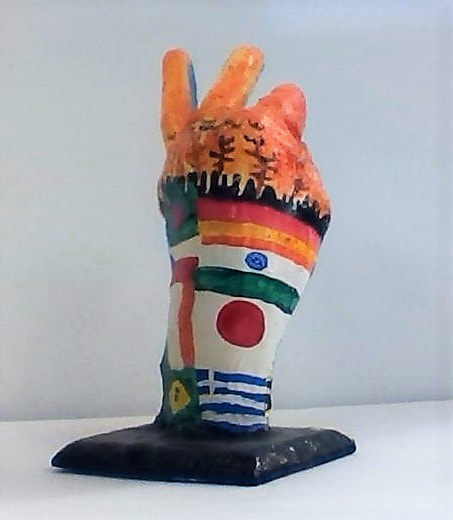
STEP 1 - Sketch THREE ideas:
After thinking about several ideas, select one of your ideas and on a piece of paper, sketch in color your ideas for your hand sculpture. You should include:
1. A statement
2. Symbols (these can be color) and meaning
Come up with your own (do not use one of these) but here are some examples:
- "All you need fits in the palm of your hand"
- "The world is my oyster"
- " Yesterday is behind you"
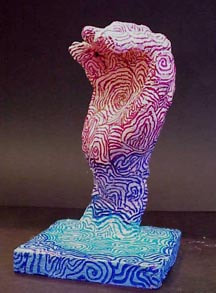
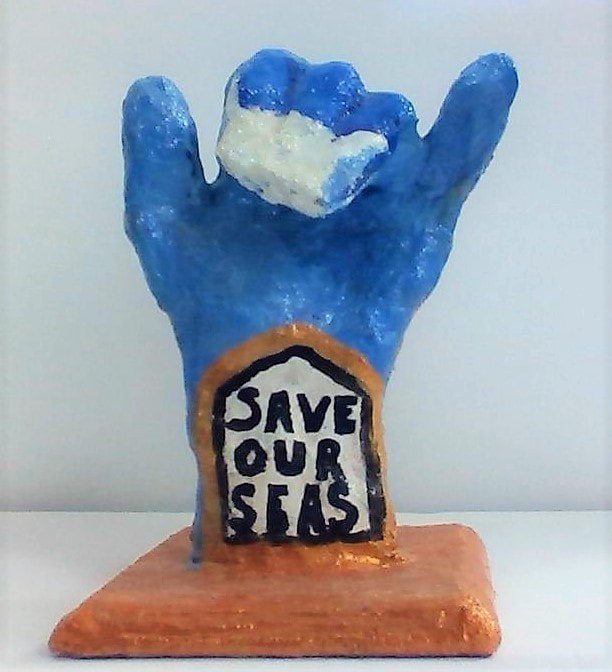
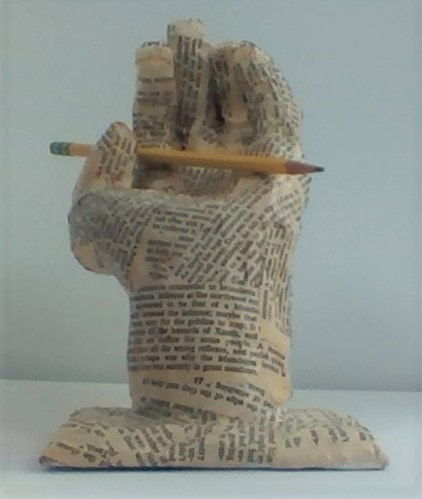
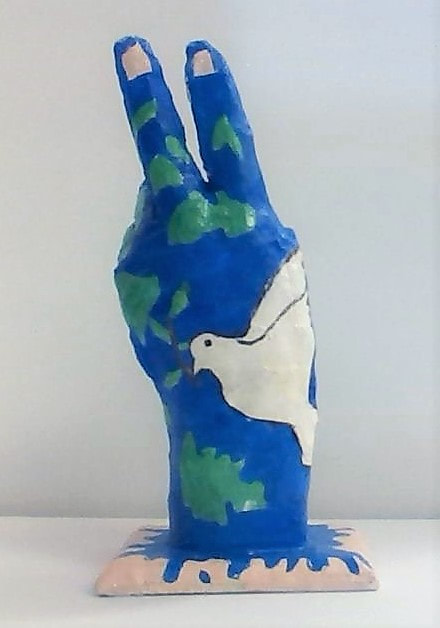
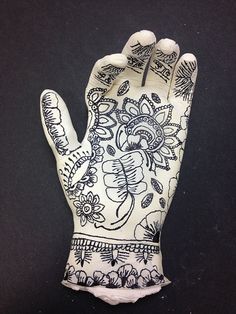
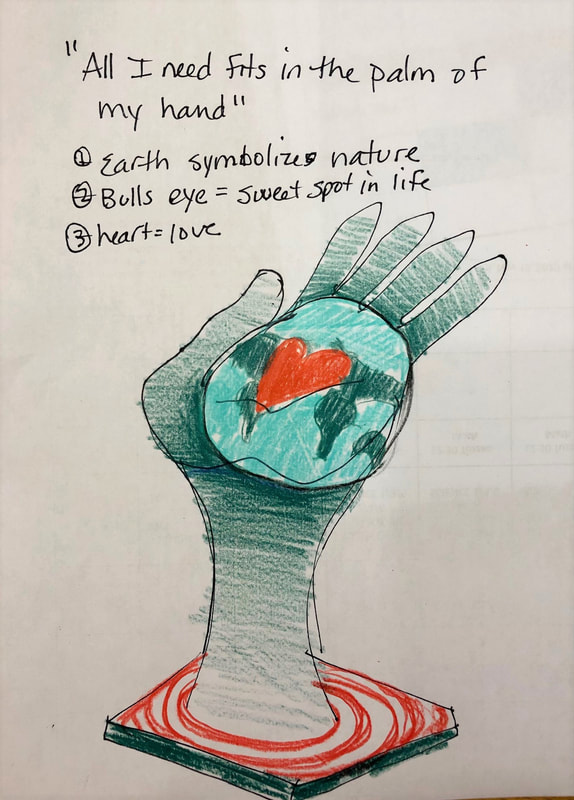
Here is an example:
1. A statement
2. Symbols (these can be color) and meaning
Come up with your own (do not use one of these) but here are some examples:
- "All you need fits in the palm of your hand"
- "The world is my oyster"
- " Yesterday is behind you"
Here is an example:
STEP 2 - Submit Your idea in canvas
STEP 3 - PLASTER YOUR HAND IN PARTS (WATCH VIDEO)
You should have about 20 pieces of each size every time you start plastering:
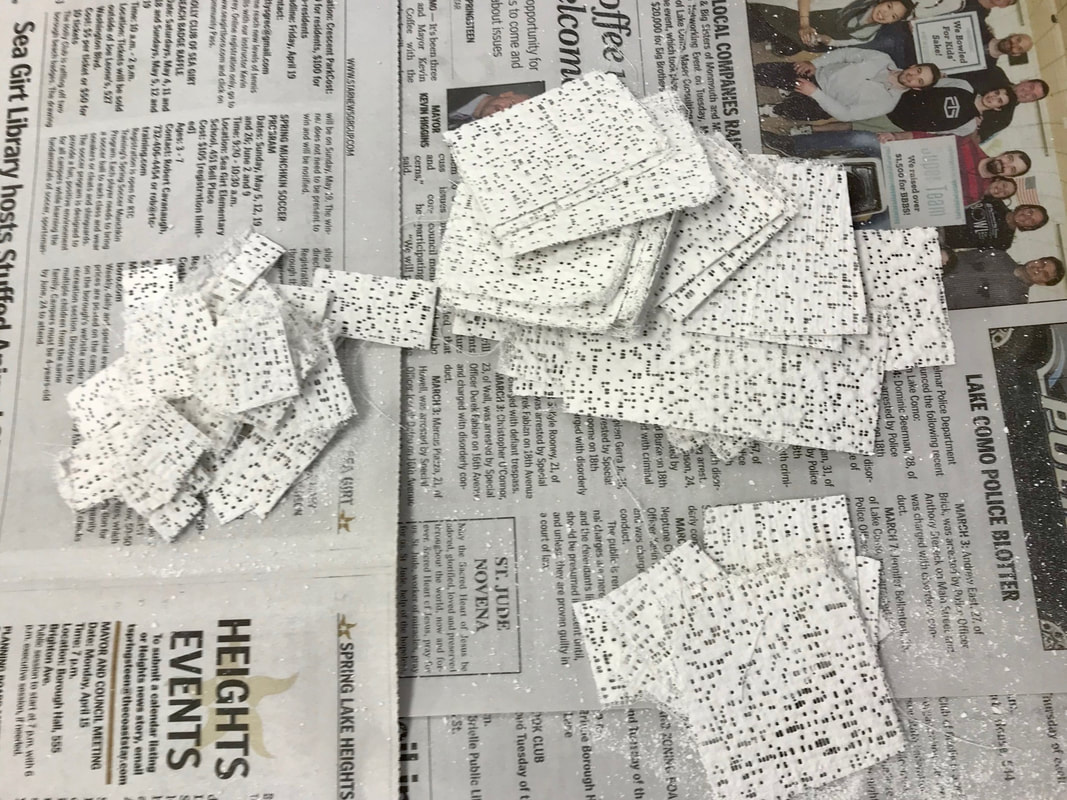
Watch the video below on how to start. You will need to do a part that has NO "undercuts" so you can take it off. DO NOT DO YOUR HAND ALL IN ONE PIECE OR YOU WILL NOT BE ABLE TO GET IT OFF". You will need about 15 minutes for the plaster to dry before you can remove you hand. Other wise the plaster will be too floppy. Be sure to put cream on your hand so the plaster does not stick.
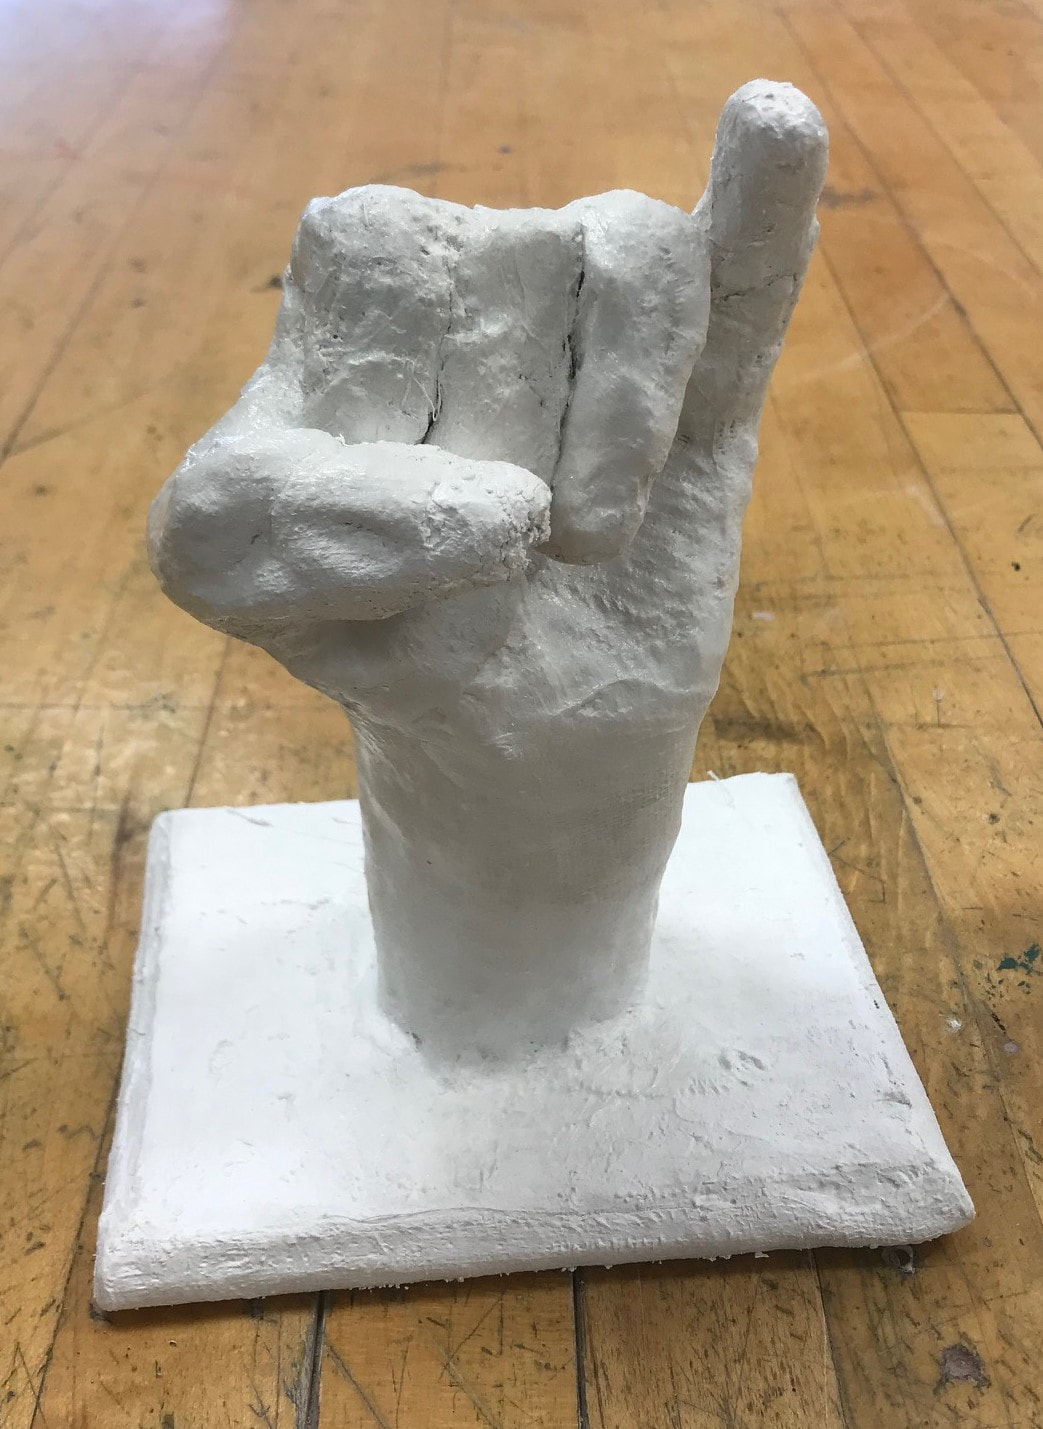
When all the pieces are done, you can plaster them all together. When this is done, you can trim the wrist area to your hand sits clean on the wood block. You can then plaster to wood block so the hand is attached.
STEP 4 - Decorate the hand based on your design.
You are to paint/decorate the hand based on your design either at school or at home.