Art|TRa
  • Welcome!
    • Rules & Procedures
  • Fine Arts
    • Welcome to Fine Arts!
    • Contour Drawing
    • Value Drawing
    • Cropping in Photoshop
    • Acrylic Painting
    • Oil Painting - Fine Arts
    • Two Point Perspective
    • FUN Friday Creations
    • Monochromatic Portraits
    • Auctioning of Art
    • Murals!
    • Mural - Shepard Fairey
    • Andy Goldworthy
    • Doodle 4 Google
    • Impressionism >
      • Impressionism Enrichment Projects
    • Commentary of Art
    • Will Kemp Art School
  • Sculpture
    • Welcome To Sculpture
    • Book Sculpture
    • Alebrijes
    • Origami Mandala
    • Recycled Cardboard
    • Mini Clay Heads
    • Mark Jenkins Sculpture
    • Wood Block Sculpture
    • Cloisonne Relief Sculpture
    • Direct Cast Plaster Hands
    • Foam Relief sculpture
    • Plaster Cast Relief Tile
    • Foam Sculpture
    • 3D Modular Origami
    • Origami - Single Sheet
    • Mini Clay Head Carving
    • Snow !!!!
    • 3D Glasses
    • Wire Sculpture Line Drawing
    • Ann Weber Sculpture
    • Quill Snowflake
    • Soap Stone Sculpture
    • Pop Art Sculpture
    • Reed Lanterns
  • Foundations of Art
    • Foundations: Welcome! >
      • Elements of Art
      • Principles of Design
      • Elements vs Principles
    • Line: Contour meets Texture
    • Space & One Point Perspective
    • Value
    • Atmosph Persp- India Ink Landscapes
    • Color basics & mixing
    • Color Wheel
    • Color Schemes
    • Oil Pastel Still Life
    • Block Printing
    • Cardboard Famous Artist
    • Positive / Negative Space
    • Exploding Portraits 1 pt perspective
    • Texture Exploration
    • Lined Paper Form
    • Form
    • String Balloons
    • Shape
    • Shibori Tie Dye
    • Kinesthetic Drawing
    • Painting Basics: Acrylic
    • Bead Loom
    • Zentangle Watercolor on Paper
  • Ceramics
    • Ceramics Intro: Welcome!
    • Methods of Sculpture Creation
    • Pinch Pot >
      • Clay Fish Pinch Pot
    • Pinch Pot Wax Resist Egg Vessel
    • Coil Building
    • Clay Sgraffito Vessel
    • Imprinted Textured Plate
    • Clay Living Mugs
    • Clay Whistle
    • Relief Story Tiles
    • Spirit Boxes
    • Tripod Vessls
    • Wheel Throwing
    • Cereal Bowl
    • Clay Sun
    • Kintsugi
    • Slab Lantern
    • Underglaze Sgafitto Plate
    • Kaleidoscope Tiles
    • Birdhouse
    • Origami Bowls >
      • Soft Slab (thin)
    • Slip Trial
    • Snowflakes
    • Stencil Glazing
    • Making Glaze Sample Tile
  • Painting
    • Sumi e Painting
    • Fauvist tempera Paint
    • Faith Ringgold Emotional Storytelling
    • Modern Art - Acrylic
    • Oil Painting
    • Watercolor Painting
  • Diversity of Modern Art
    • Contemporary Art
    • Kandinsky - Nonobjective Art
    • Visual Literacy
    • Process Art
    • Performance Art
    • What is Art?
    • Cubism >
      • Cubism Enrichment Projects
    • Monoprint
    • Jasper Johns
    • Chuck Close >
      • Chuck Close - Middle School
  • Cultural Arts
    • Dream Catcher
  • Spare time Projects
    • Blenduko
    • Blackout Poetry
    • Macrame
    • TED Talk - Art Ed
    • Quaranthing
    • Art videos to watch >
      • Fun Misc Art videos
      • The Next Great Artist
      • Famous Auctions
      • Art21 Videos
    • Clam Shell dish
    • The Tate Gallery
    • CD Weavings
    • Negative Space Sculptures
    • Nature Drawings
    • Paper Airplane Challenge
    • Linify Me
    • Famous Painting Challenge
    • Snowflakes - Paper
    • Relief Symmetry
    • Google Apps
  • Extras
    • Same Proportion
    • Working in Groups
    • Exacto Blade Safety
    • Collage Self Portraits
    • Window Painting
    • Rose Window
    • Prehistoric Art
    • Georgia O'Keeffe Oil Pastel
    • Final Exam Prep - Foundations
    • Superhero

Project overview

For this project you will be creating:
1. A sample sheet showing different techniques
2. A snowman
3. A Fish or flower
4. A Lighthouse

Sample sheet:

Here you will create a "sample" of the following techniques:
1. Wet on wet
2. Dry
3. Gradient
4. Salt
5. Resist
6. Sponge
7. Plastic Wrap
8. Cardboard

Follow the instructions on each technique below and complete the sample in your sample sheet. 

STEP 1 - To start, cut you piece of paper and label it as shown. If you are using your home paper, create eight sections approximately 3 x 4 inches.
STEP 2 - Do #1 wet on wet technique. This is basically wetting the paper before applying any pigment. Please watch the video below. In this video he used three colors, your sample sheet only needs one color.
STEP 3 - Do #2 Dry technique after watching this video.
STEP 4 - Do #3 Gradient. Similar to wet on wet but use plain water to create a gradient that gradually transitions from color to no color. Watch the video below and use clear water instead of an additional color.
STEP 5 - Do #4 Salt Technique. It is the application of some table salt crystals to a wet watercolor area. In this video, please ignore the third demo of speckling "masking fluid" on the watercolor area.
STEP 6 - Do #5 Resist Technique. This is where you use tape or some other medium to "block" the watercolor from getting on the paper. In this case, you can used masking tape (blue painters tape is best if you have it)
STEP 7 - Do #6 Sponge technique. Use whatever types of sponges you can get your hands on. This technique will help to add texture to your paintings.
STEP 8 - Do #7 Plastic Wrap technique. In the video below, the artist compares different types of wrap. You don't need to do that, just one example using any plastic wrap. Be sure the paint has some water and it very wet. It will not work if the paint is dry on the paper.
STEP 9 - Do #8 Cardboard Technique. Fast forward to time stamp 2:11 to see this technique. Try it out as the last sample. 
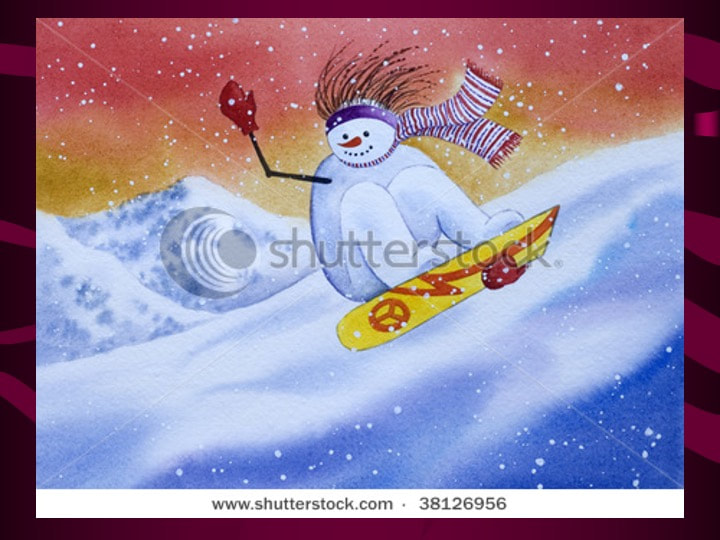
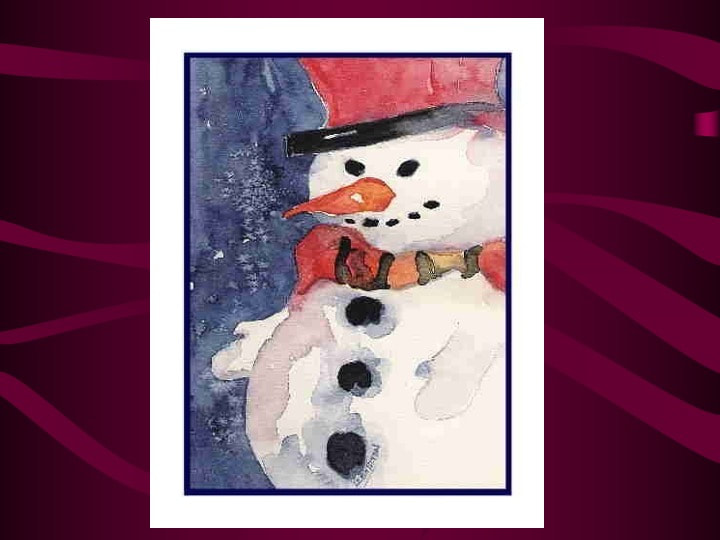
Snowman scene

STEP 10 - Create a snowman scene using at least FOUR techniques. Paint from lightest to darkest and wettest to driest. Here are some examples. You should use the piece of your watercolor paper that you cut off. 
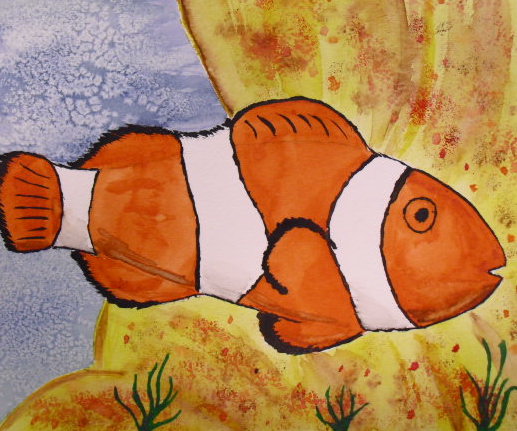
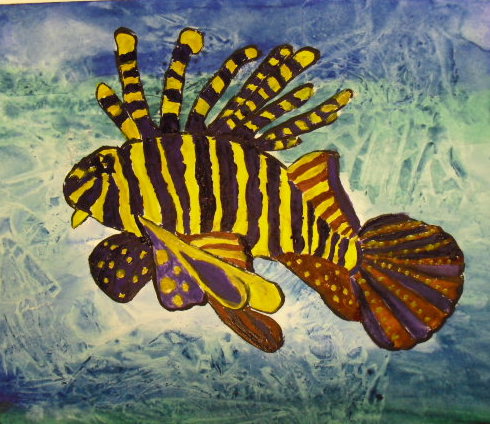
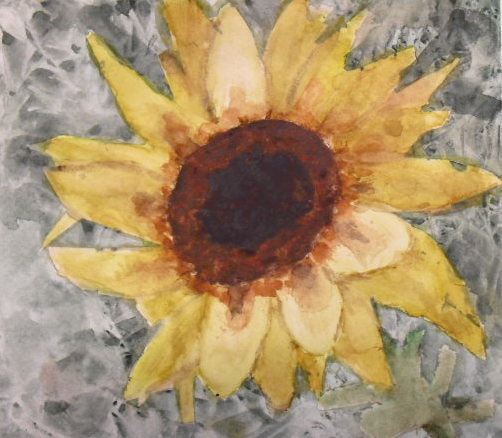
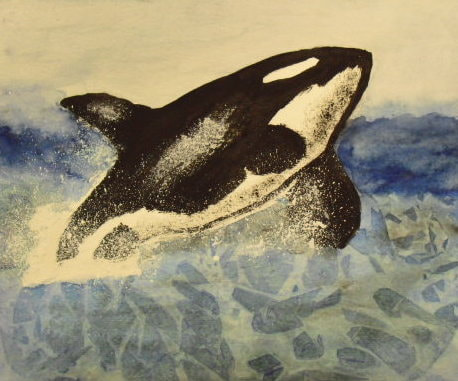
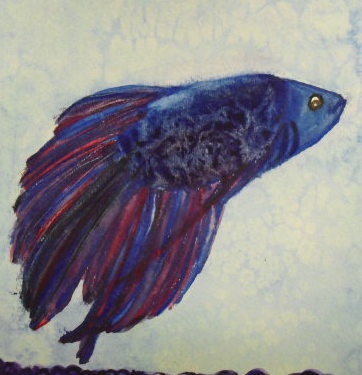
Fish or flower

STEP 11 - Create either a fish or a flower using at least FOUR techniques. Paint from lightest to darkest and wettest to driest. Here are some examples. You should use the second piece of watercolor paper. ​
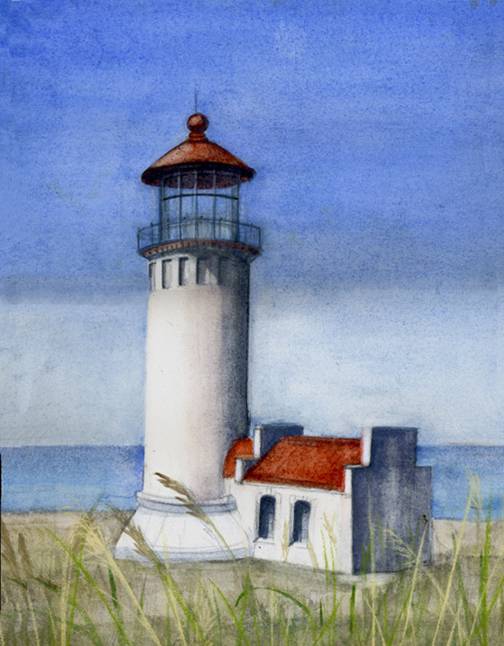
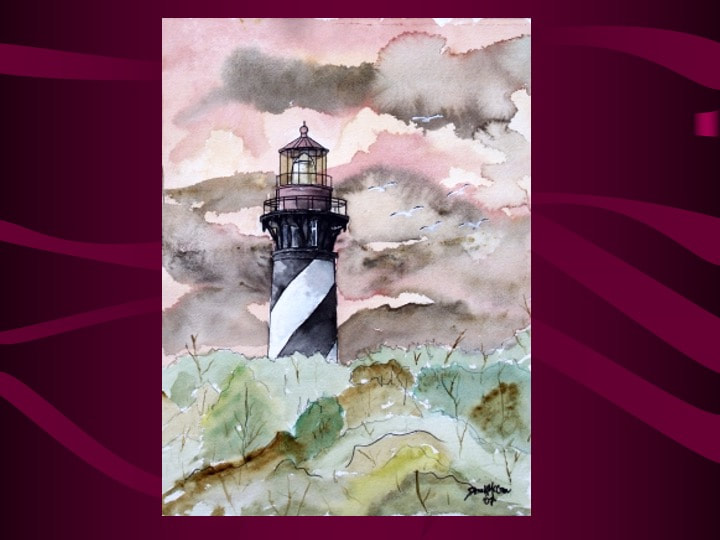
Lighthouse

STEP 12 - Create a lighthouse painting using all techniques to enhance your painting.. Paint from lightest to darkest and wettest to driest. Here are some examples. You should get from school another piece of watercolor paper. ​Use tape to cover your lighthouse when you are doing your sky.
Powered by Create your own unique website with customizable templates.